Selecting the right assets
Élisa places assets directly on ground-level surfaces, so be sure that each asset has its pivot point accurately positioned at the base. Supported asset types:- ✅ Meshes
- ✅ Prefabs (Unity)
- ✅ Blueprints (Unreal)
- ✅ Models in your Toolbox (Roblox)
Generating a Catalog
Once your assets are selected in the Content Browser, generate the catalog:Option 1:
- Open
Edit > Project Settings > Plugins > Elisa > Descriptionstab - Click **Generate Catalog **or **replace catalog **(if already catalog exist) button.
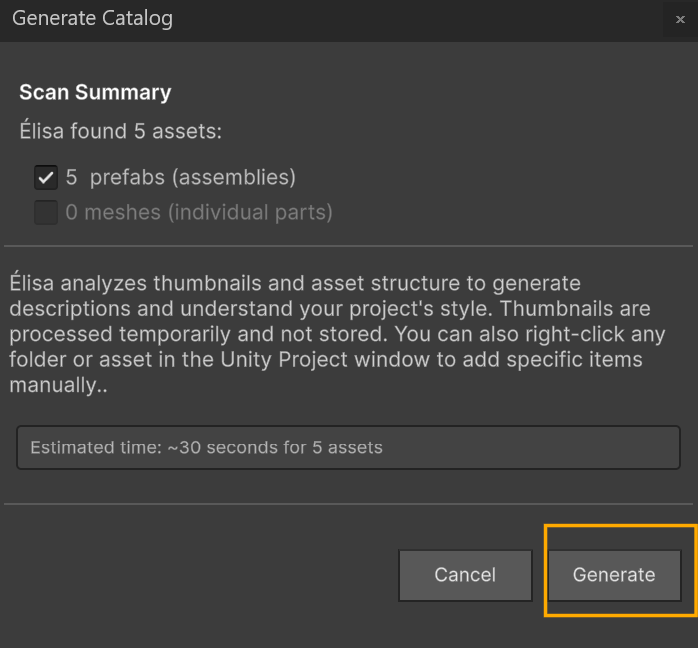
- Élisa scan the entire project files assets and diplays the number of assets contained in a window.
- Press Generate button
Option 2:
-
Right-click the selection and choose
Add to Catalog. - Élisa scan the folder or selected assets and diplays the number of assets contained in a window.
-
Press Generate button

On Roblox, the catalog is generated by Élisa itself. All assets in your toolbox will be added to your catalog and be ready to be used by you and Élisa.
- The system will display a progress bar while it:
- Analyze bounding boxes, compute asset sizes, and generates thumbnails.
- Exports the catalog as a CSV file.
- Once generation completes:
- Élisa shows a Generation completed notification in the progress bar.
- The catalog is automatically uploaded and set as active - no manual upload needed!
- Élisa is instantly ready to use the new catalog!
You can download the currently active catalog at any time from the ⚙️ Élisa Settings panel:
Same for Unity, in this section of the ⚙️ Élisa Settings panel: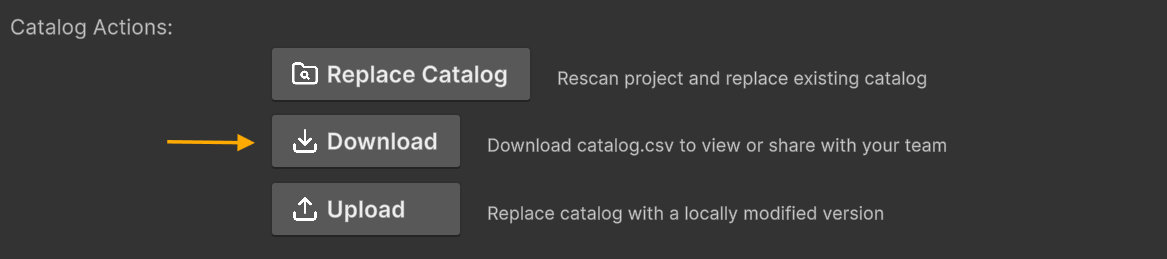
Roblox catalogs are dynamically made from your Inventory
Uploading your Catalog CSV manually
If you’ve built your own catalog.csv, you can upload it from the ⚙️ Élisa Settings:
Simply click Upload to select and load your .csv file:

Updating an Existing Catalog (Append or Replace)
Élisa supports appending new assets to your current catalog or replacing it entirely from the Generate Catalog window.-
Select the assets you want to add and Right-click the selection and choose
Add to Catalog. -
In the Update Existing Catalog section, choose one of the following:
- Append to catalog: Adds the selected assets to your current catalog.
- Generate a new catalog (replace existing entries): Rebuilds the catalog using only the selected assets.
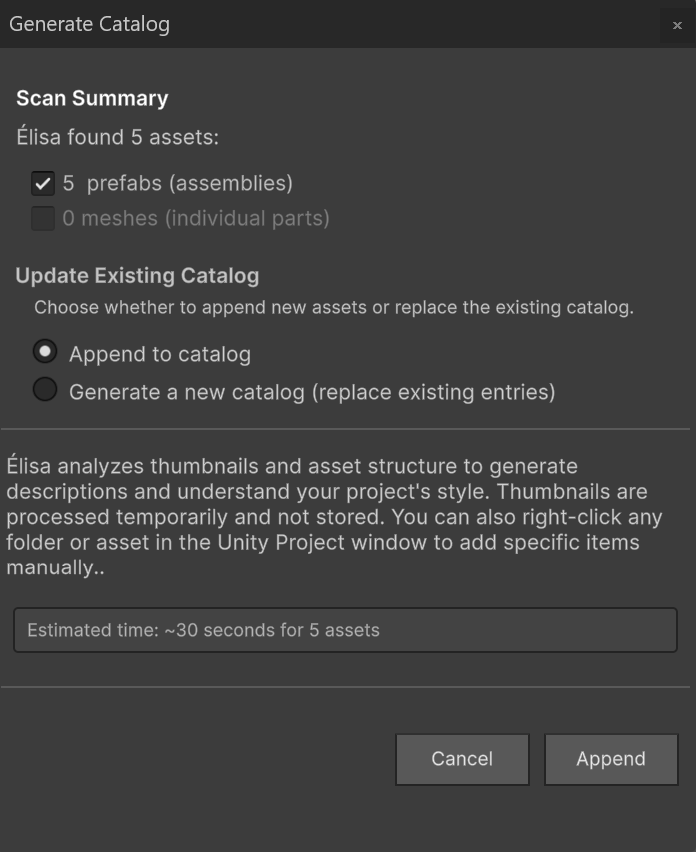
- Click Append or Replace Catalog button to start the process.
Creating your own Catalog CSV from scratch
If you’d like to define a custom asset catalog manually, you can construct your owncatalog.csv file. Élisa supports this advanced workflow by reading structured .csv files with detailed asset metadata.
Your catalog.csv should use the following format:
| index | description | path | x_size | y_size | z_size | rotation_for_facing_forward |
|---|---|---|---|---|---|---|
| 0 | A quaint cottage featuring a chimney… | /Game/Assets/SM_Building_1 | 790.85 | 864.28 | 989.85 | -90 |
| 1 | A house with a blue roof and porch… | /Game/Assets/SM_Building_2 | 968.24 | 1345.69 | 1517.63 | 180 |
Required columns
- index: A unique row identifier.
- description: A short text describing the asset.
- path: The full package asset path from your Unreal project.
- x_size / y_size / z_size: Bounding box dimensions in centimeters.
- rotation_for_facing_forward: The rotation in degrees Élisa applies to align the asset’s front side with the +X axis.